By Nadia Arumugam |

Defy the January Blues with Bright, Zesty Flavors: Lemon Pepper Swordfish with Citrus Basil Aioli

Happy New Year, dear reader!  We do hope you had a relaxing, rejuvenating break, and are looking forward to attacking 2013 with gusto, zeal and bucket loads of energy.

Hmmm. Yes, that’s how I feel too. I’m not sure quite how it happened. After all, I really didn’t do too much over the holidays, well unless there’s such a thing as too much lounging around – no, surely not. But one week into the New Year, and I’m exhausted, sun-deprived, and just about ready to admit defeat.

Damn these January Blues.

I do know of one tonic though to beat off these feelings of doom and gloom and world weariness. You’d be forgiven if you think I was going to say chocolate (you know me too well), but actually I mean to suggest filling your days with zesty meals packed with bright colors and fresh flavors.  It’s not just an aesthetic thing either, bright foods, I mean vegetables (not M&Ms) are typically filled with all manner of nutrients. And citrus as we’ve already established in an earlier post is full of anti-oxidants, so enjoying a Mediterranean-style diet of fish, olive oil, citrus and verdant salads and bright vegetables is bound to lift your spirits, boost your energy levels and perk up your immune system.

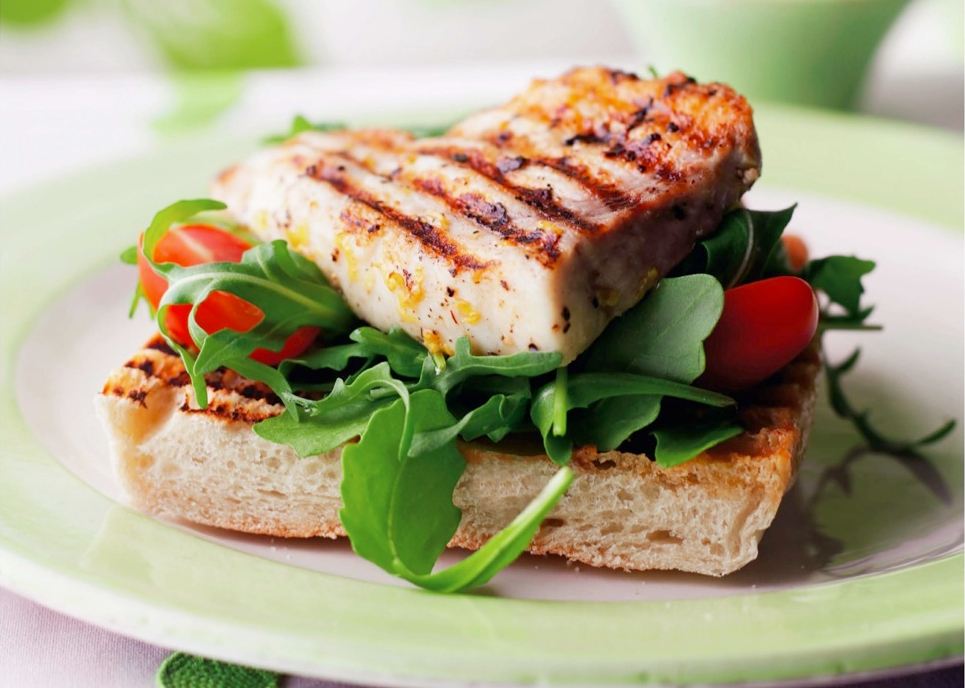
The first recipe of the year then to ease you out of your doldrums, is a lemony grilled swordfish marinaded with freshly cracked black pepper and lots of extra virgin olive oil. To up the ante, I accompanied this with an aioli- that’s a fancy word for a flavored, homemade mayonnaise, that gets its zing from fresh lemon, lime or orange juice  and fresh basil.  If you don’t have time to make the aioli form scratch you can use a good quality store-bought fresh mayonnaise and just stir in extra citrus and shredded basil.

You can serve the fish on top of toasted, garlic-rubbed ciabatta “bruschetta,” and hey presto you have a swanky open-faced fish sandwich, or you can go down the healthy route and settle for an arugula and baby tomato side salad instead.

 Lemon Pepper Swordfish with Basil Aioli

Serves 4

For the Lemon Pepper Fish
4 x 6-ounce swordfish steaks (you can use tuna or mahi mahi, instead)
2 Tablespoons extra virgin olive oil
Zest of 1 lemon
1 teaspoon freshly cracked black pepper
1/2 teaspoon salt
4 cups packed arugula
1-1/2  cups halved baby tomatoes

Citrus Basil Aioli
1 large clove garlic, crushed
1 large egg yolk
1-1/2 Tablespoons fresh lemon, lime or orange juice
1/2 teaspoon Dijon mustard
Pinch of salt
1/2 cup olive oil
3 Tablespoons shredded basil

Garlic Bruschetta (Optional)
1 ciabatta loaf
1 clove garlic, halved
1 Tablespoon extra virgin olive oil

Place swordfish steaks in a shallow dish.

In a small bowl combine all the other ingredients for the fish then pour over the swordfish. Using your hands, rub the mixture all over the steaks until well coated. Set aside.

Make the aioli: Place all the ingredients for the aioli except the basil and the olive oil in the small bowl of a food processor. Start the motor running and process for 10 to 15 seconds, then add the olive oil in a slow, steady stream until the sauce has emulsified and thickened. Transfer to a bowl, stir in the basil then taste and add salt, and extra lemon, lime or orange juice, if necessary.

Heat a ridged griddle pan on the stove until very hot. Place the swordfish steaks, two at a time (or all four at once, if your pan is large enough),  on the hot pan. Cook for 3 to 4 minutes on either side until well marked on the outside and medium on the inside. Remove from the pan and leave to rest.

If serving the fish on the bruschetta, wipe down the griddle pan then place the bread pieces, cut side down on the pan, and toast for a couple of minutes  until golden. Rub the toasted surface of the bread with the halved garlic and drizzle with the olive oil.

To serve, divide the arugula and cut baby tomatoes over the ciabatta, if using, and place the swordfish on top. Spoon a little aioli over or serve it separately. If not using the bread, simply arrange the fish alongside or over a mix of the arugula and tomatoes.

By Nadia Arumugam |

Going Nuts for Candied Spiced Pecans

If you’re in charge of the spread this holiday season, you’re probably becoming increasingly nervous as the big day approaches. No doubt it’s of no help whatsoever  that people like me needlessly point out that Christmas is indeed only a week away. But, here is something truly valuable, a little recipe that might win you some much-needed extra minutes for those final moments of cooking, plating or…panic.

Nuts. Yes, nuts. Everyone loves them, and there’s so many to choose from. A bowl of pistachios or lightly salted peanuts or just-cracked walnuts can go a long way to appease a growling belly. But it’s the festive season and unadorned nuts just aren’t going to cut it with demanding guests expecting an elevated level of culinary execution. With this in mind, I have the perfect tidbit offering that will happily occupy  and satisfy the extended family, Candied Spiced Pecans. They are ridiculously easy to make, and can be whipped up days, nay weeks in advance. And they serve another purpose too. If anyone turns up unannounced and you don’t have a present in hand, simply bottle up these decadent nibbles, and hey presto, instant gifting.

I’ve tried several different methods for these pecans over the years, and I like to think of the recipe below as my ultimate opus…the final word on candied pecans. Technically, of course, they’re not really candied. Technically, candying something entails messing around with boiling sugar. I’ve messed around with boiling sugar before, and have the scar to prove it. Instead, I coat my pecans in whipped egg white which acts as a kind of adhesive. Combined with a sugar and spice mix the egg white becomes a gummy, sweet-savory coating that, almost by magic, turns into a crunchy, candy-like glaze after baking.

These pecans are quite simply irresistible, so make double what you think you might need!

Candied Spiced Pecans

 1 egg white
2 teaspoons vanilla extract plus 1 teaspoon water
1 teaspoon ground cumin
1/4  teaspoon ground cayenne
1/4 teaspoon ground cinnamon
1 teaspoon salt
1/2 cup white granulated sugar
1/2 cup light brown sugar
1 pound pecan halves

  1. Preheat oven to 250 degrees F. Line one large baking sheet or 2 smaller ones with parchment paper.
  2. In a large mixing bowl, beat together the egg white, vanilla extract and water until it resembles fluffy mallow and you can create soft peaks when you lift up the beater. In a separate large bowl, mix together spices, salt, and sugars.
  3. Add the pecans to the beaten egg whites, and stir to coat the nuts evenly. Remove the nuts, and add them to the sugar and spice mixture. Toss until all the nuts are evenly coated. Spread the nuts out on the prepared baking sheet(s) in a single layer.
  4. Bake for about 1 hour and 20 minutes, stirring every 20 minutes.
  5. Remove the pecans from the oven and leave to cool for 10 minutes. Transfer the nuts to a cooling rack taking care to carefully separate them if any are stuck together. Leave to cool completely – they will become crunchier when cool. Store in an airtight container for up to 1 month.
By Charity Shumway |

Citrus Inspiration

There are lots of reasons to grow indoor citrus. So you can try Nadia’s Meyer Lemon Curd recipe, for one. But another big one for me is just that citrus trees are so pretty. Those fragrant blossoms, the glossy green leaves, and of course, the fruit decorating the arcing branches for months before its ready for plucking — could there be a more luscious houseplant? In case you need further convincing, behold: citrus in action.

images: 1, 2, 3, 4, 5, 6

By Charity Shumway |

Growing Lemons (and Limes and Oranges) Indoors

I would like to live in Spain or Sicily or even Sacramento, someplace where oranges grow on trees in tiled courtyards and mild, golden sunlight blesses the earth all winter long. Alas: New York. But citrus dreams die hard, and if you, like me, live in a cold-winter climate but still long for fragrant lemon blossoms or branches drooping gracefully with limes, I am the bearer of glad holiday tidings. You can grow citrus trees in your apartment! And now is the perfect time to plant them. Merry Citrus! Season’s Grapefruits! (That was bad, I know).

So let’s get to this. There are two big essentials for citrus happiness. Temperature is first. The reason oranges grow outdoors in Morocco but not in Manhattan is that below 55 degrees they shiver and start to bid farewell to this cold, cruel world. So that’s the first condition. Do you keep your apartment heated to above 55 degrees? I bet you do. The next condition has to do with hours of sunlight. Citrus trees like sunshine. Six to eight hours a day is ideal. Does your apartment have a window? I bet it does. Extra points if it’s south facing. (Don’t fret if not. Mine are north facing, and yet my three citrus trees are happily blossoming right now). In sum: if you heat your apartment and have a window, you can grow a citrus tree.

The next thing to know is that some types of citrus trees are better suited to indoor growing conditions than others. And, lucky us, turns out that many of the juiciest, prettiest types of citrus are on the list. Meyer Lemons, Kieffer Limes, Mexican Sweet Limes, Washington Navel Oranges, and Oroblanco Grapefruits — all indoor-compatible. Plenty of nurseries and plant stores stock citrus plants this time of year. If you can’t find one nearby, my favorite online purveyor is Four Winds Growers. (If you can spring for it, a 2-3 year old tree will bear fruit faster. With one-year olds, you can be waiting a while).

There are just a final few things you need to know. Water: citrus trees like plenty of it, but their roots hate sogginess. That means you need a fast-draining soil and plenty of drainage holes in the bottom of the plant’s pot. Rather than regular old potting soil, buy special citrus or cactus soil. Once your plant outgrows the plastic pot it came in, or if you decide to repot it to a prettier pot right away, use the citrus soil to fill in around the roots. Then water your citrus baby at least twice a week. You’ll also want to fertilize your tree for maximum leafing and blossoming and fruiting. Tomato fertilizer will do, with feedings roughly every six weeks. I have also happily used citrus spikes.

Last but not least, harvesting. Patience is the name of the game. Your lovely oranges, lemons, or limes can be hanging from the branch for a few months at what looks like full-size before they’re truly ripe. The real test is touch. If they’re rock hard, they’re not ready. If the flesh gives a little when you push, let the citrus feast begin.